


ProjectLibre is considered one of the best open-source project management tools. It was created by the founders of OpenProj and continually gains popularity. In the following article, we will show you how to create your first project in ProjectLibre. This tutorial will give you a sense of ProjectLibre’s basic functions. Our objective is to explain how you can use this program with ease; it is not an explanation of project management methodology for projects.
Visit SourceForgeProjectLibre could be the first project management tool that you use, and therefore, it’s worth mentioning that nearly all data is entered in tables as rows, like Excel. And after all of it is entered, diagrams, Gantt charts, and a work breakdown structure (WBS) are automatically generated. No need to draw the diagrams yourself, all you have to do is clearly define your project, and enter your project data correctly.
Read more: Top 10 Open Source Project Management Software Picks
Downloading, Installing, and Running ProjectLibre
ProjectLibre is available to download for free via SourceForce, with options for Windows, Mac, and Linux users. Once you have downloaded and installed ProjectLibre, you should see a window like this one below that welcomes you into the software.
Visit SourceForce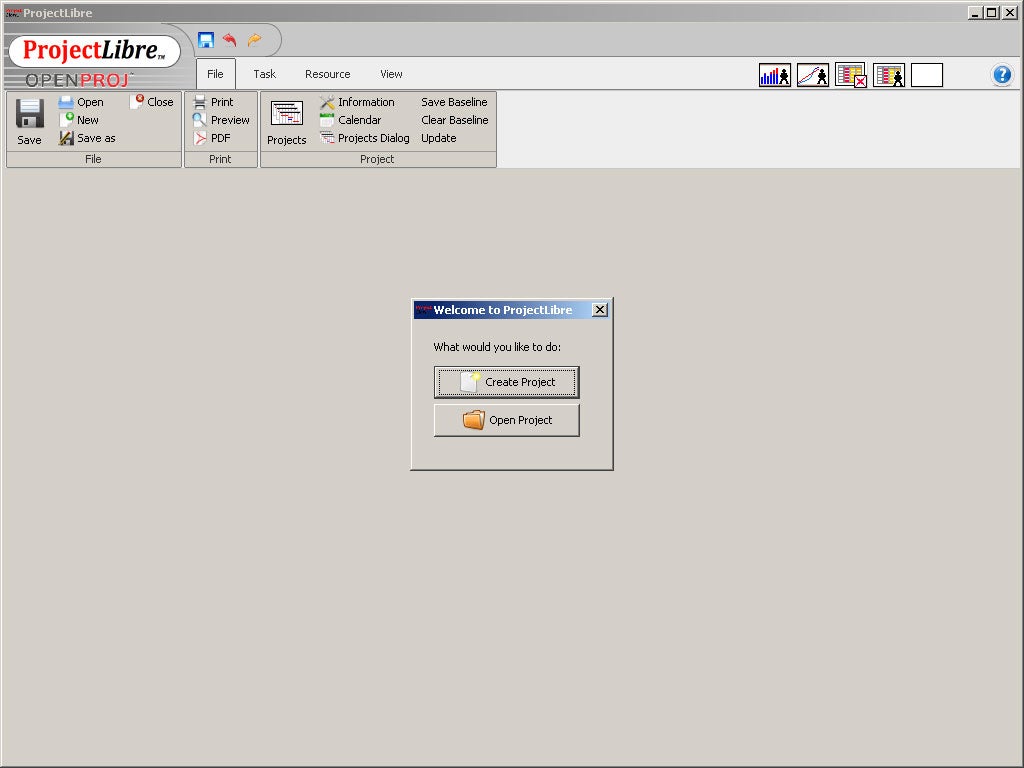
The welcome screen within ProjectLibre.
Ready to Create Your First Project?
After clicking on “Create Project” you must enter some basic project details as seen in the screen below. This helps establish a baseline of information about the project and its parameters.
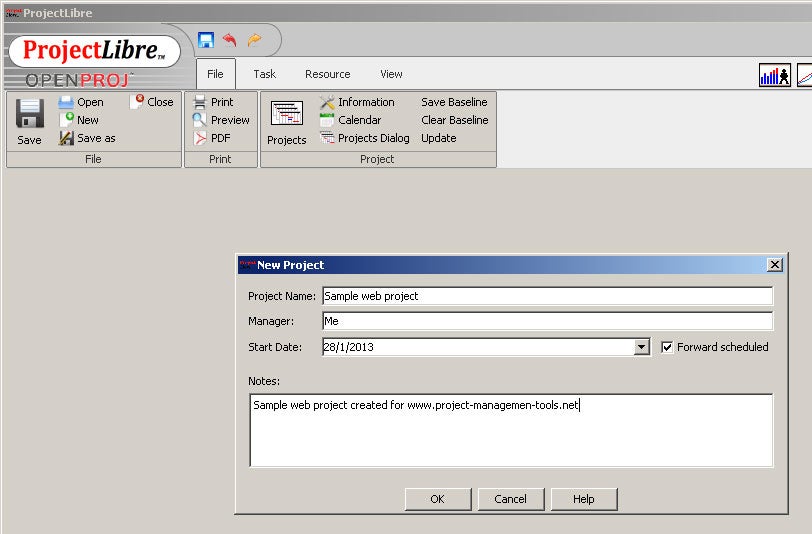
The process of creating a new project in ProjectLibre.
You will need to enter the following information about your project:
•Project Name
•Manager
•Start Date
•Notes
Forward Scheduled: If “Forward Scheduled“‘ is checked, then the project’s end date changes according to the task finish dates you enter. If “Forward Scheduled” is unchecked, then you indicate the project’s finish date/deadline. This means that the project has a mandatory, non-negotiable, end date.
Adding Your First Task
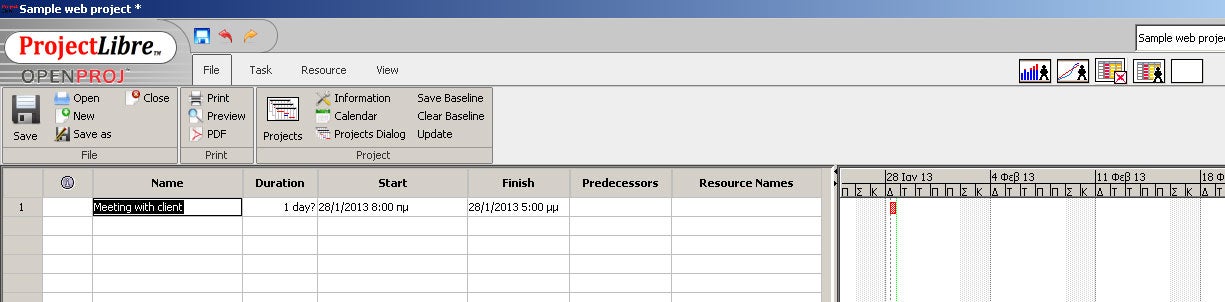
Example of task creation within ProjectLibre.
After you enter your project details you are ready to create your first task. As seen in the table above, fill out essential information about the task, such as name, duration, and start. The finish date is then calculated automatically.
On the right of this window, is where you will see the project’s Gantt chart, which helps you visualize task dependencies and due dates.
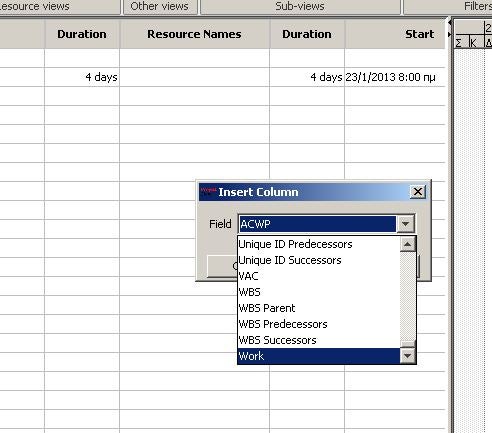
Example of how to track time to task completion.
You may want to see how many hours it takes to complete a task. You can do this by right-clicking on the column “Duration“, click “Insert Column” and then select “Work”, as shown above. After showing the total project’s work hours, double-click on the tasks record for different viewing options. For example, double click on “Meeting with Client” text. As seen below, you can see some of the task’s options:
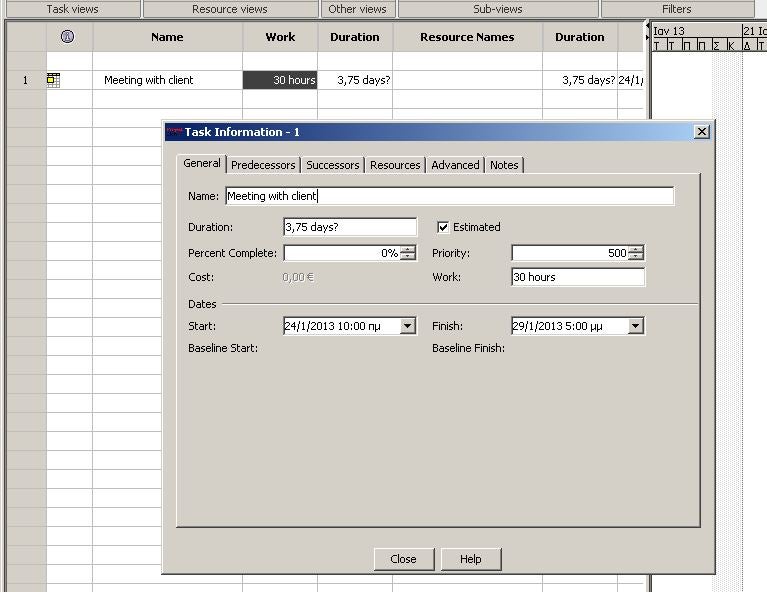
Example of task details in ProjectLibre.
“Duration” and “Work” represent the task’s duration. “Start” represents the task’s start and “Finish” is calculated automatically. You can click on “Estimated‘” if you are not sure about the task’s duration. You will see a question mark near “Duration“. We will discuss other tabs (Predecessors, Successors, Resources and Advanced) in another tutorial.
Connecting the Tasks
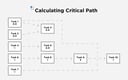
One of the most fundamental actions that you will do when planning a project is connecting tasks to one another as the start of some tasks are dependent on others completion. To do this, add tasks as shown in the image below (left) and then drag and drop the first task to the third task as shown on the right of the image. Your tasks are now dependent on one other. Red tasks mean task dependency. Blue tasks means no task dependency. As you can see in this image below, this is a great way to visualize your project’s critical path.
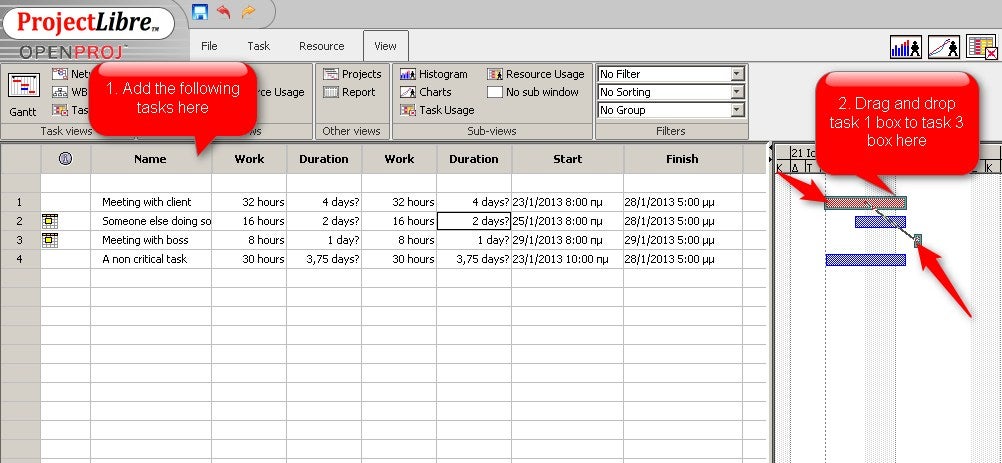
Example of task dependency visualizations, with Gantt chart view.
Check Out Our Full Library of ProjectLibre Tutorials
- Part 1: Creating your first project
- Part 2: Task Breakdown, Resources
- Part 3: Assigning resources, calculating costs
- Part 4: Project Baseline, Calendar
- Part 5: Reports
FAQs
Compared to traditional project management software solutions, open-source project management solutions are centered around a publically accessible design, making it easy for users to modify and inspect the software. Users are able to modify the code of the software, gaining a higher degree of customization options compared to traditional solutions.
While only you can decide which project management solution is right for you, you can narrow down your best choices by understanding your background and intent for use. If you are a user who’s looking for a high degree of customization and has prior experience with open-source solutions, ProjectLibre can be a great choice for you.
Yes, ProjectLibre is free to download and use.