At the previous parts of the tutorial we saw how to create your first project, create and breakdown tasks and also how to create project resources. At this part of the tutorial we are going to see how we can assign resources to tasks and how to calculate project costs.
All tutorial parts:
- ProjectLibre tutorial Part 1: Creating your first project
- ProjectLibre tutorial Part 2: Task Breakdown, Resources
- ProjectLibre tutorial Part 3: Assigning resources, calculating costs
- ProjectLibre tutorial Part 4: Project Baseline, Calendar
- ProjectLibre tutorial Part 5: Reports
ProjectLibre user interface reminder
After opening your project to switch between resources do the following:
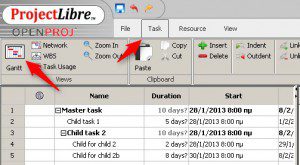
To view tasks click on ‘Task’ at the top menu and ‘Gantt’ button on the left
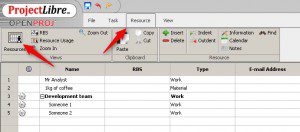
To view resources click on ‘Resources’ at the top menu and then the ‘Resources’ button on the left
Assigning resources at tasks
Scenario
For this part of the tutorial we will have the following very simple scenario about a software project:
- Mr Salesman has to visit a client in order to sign the agreement by plane
- Mr Analyst has to visit the client in order to discuss requirements by plane
- Mr Developer A and Mr Developer B are going to develop the project
- Mr Tester is going to test if the project works ok
- Finally Mr Developer A and Mr Developer B are going to fix the project’s bugs
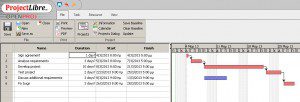
Create the tasks as shown at the following image
Now that we have created the project’s tasks, lets add some resources. For the purpose of the project we are going to use the following resources:
Material resources
- Tickets for airplane
- 0,5kg of coffee
Work (people)
- Mr Salesman
- Mr Analyst
- Mr Developer A
- Mr Developer B
- Mr Tester
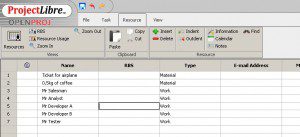
Congratulations! Now we have 2 material resources and 4 work resources available for use!
Now, go at the tasks list, double-click on the first task and then click on the ‘Resources’ tab. Then, click on the blue button with the two people.
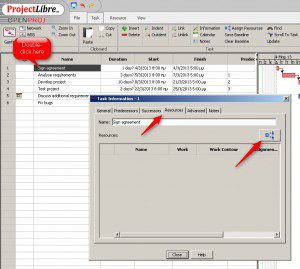
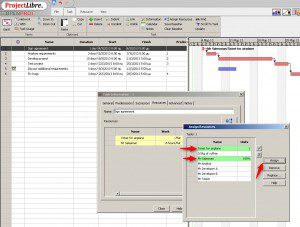
As you can see, you have the list of your project’s resources available. You can Control+click to select multiple resources for a task. Control+click at ‘Ticket for airplane’ and ‘Mr Salesman’ and then click on ‘Assign’.
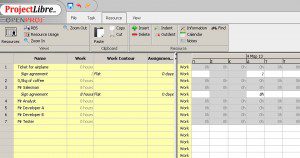
You can close the windows and click on ‘Resources’ at the top menu and then ‘Resources usage’ on the left. Congratulations on your first resource assignment! As you can see on the left side of the project you can see where each resource is used and on the right side of the project you can see a detailed view of the resource usage per day.
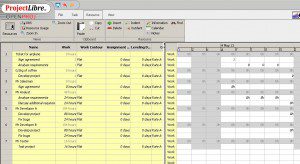
Now, go on and assign the following resources to the following tasks:
- Analyze requirements: Ticket for airplane
- Develop project: Mr Developer A, Mr Developer B, 0,5Kg coffee
- Test project: Mr Tester
- Discuss additional requirements: Mr Analyst
- Fix bugs: Mr Developer A, Mr Developer B
Your final Resource usage table should look like this:
And yes you can go on and change the hours if you wish. Increase or decrease them.
Project costs calculation
Those were the basics about assigning resources at tasks. Since we are now confident about resources, we are going to estimate the total project costs. Some words about ProjectLibre costing features:
For each resource you can define:
- Effective date: From when do the following rates are valid
- Standard rate: Rate per hour for normal working hours
- Overtime rate: Rate per hour for overtime working hours
- Cost per use: Cost for resource usage independent of duration. You can combine Cost per use with Standard rate or Overtime rate.
Notice: Although you can enter ‘Overtime rate’, I have not figured out how to actually use it.
Normally you would use standard and overtime rate for your employees and cost per use for materials or contract jobs.
Also, for each resource you can define different rate tables (A to E). When assigning a resource to a task you can choose which rate table to use.
Okay, now let’s go and add some costs. Click on the Resources table and add double-click each task to add the following:
- Ticket for Airplane: Cost per use: 200
- 0.5Kg of coffee: Cost per use: 8
- Mr Salesman: Standard Rate: 15/hour
- Mr Analyst: Standard Rate:20/hour
- Mr Developer A: Standard Rate:10/hour
- Mr Developer B: Standard Rate:10/hour
- Mr Tester: Standard Rate:5/hour
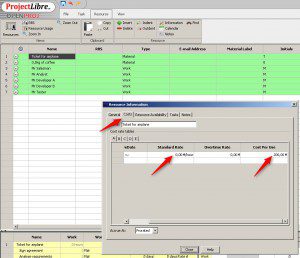
Now we want to see the estimated project cost. Go to Resource usage and Right click->Insert column and choose ‘Cost’
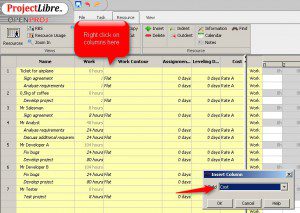
You should see the column with the cost per Resource-Task
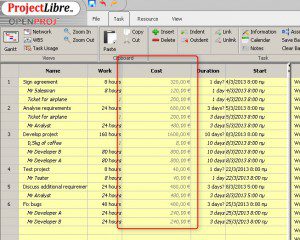
In ProjectLibre you also have the following options
View cost per Task
Click on ‘Task’ on the top menu and then ‘Task Usage’ on the left and then right click on the columns to add ‘Cost’ column as we did before. You can know see how much each task costs.
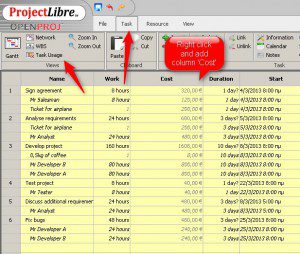
View total project costs
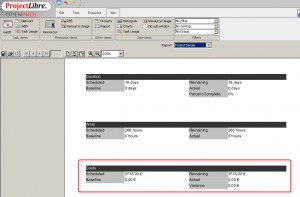
Click on ‘View’ on the top menu and then ‘Reports’. Choose report ‘Project details’. You can see the Scheduled, Remaining and Actual costs if you scroll a little down
Those were the basics about assigning resources and calculating costs with ProjectLibre. At the next part of the tutorial we are going to see ProjectLibre’s calendar settings and how can we use project baselines.
All tutorial parts:
- ProjectLibre tutorial Part 1: Creating your first project
- ProjectLibre tutorial Part 2: Task Breakdown, Resources
- ProjectLibre tutorial Part 3: Assigning resources, calculating costs
- ProjectLibre tutorial Part 4: Project Baseline, Calendar
- ProjectLibre tutorial Part 5: Reports


