


At the previous part of the ProjectLibre tutorial we saw how to assign resources to tasks and calculate project costs. At this part of the tutorial we are going to see briefly how to use project baseline and in detail the ProjectLibre’s calendar options.
All tutorial parts:
- ProjectLibre tutorial Part 1: Creating your first project
- ProjectLibre tutorial Part 2: Task Breakdown, Resources
- ProjectLibre tutorial Part 3: Assigning resources, calculating costs
- ProjectLibre tutorial Part 4: Project Baseline, Calendar
- ProjectLibre tutorial Part 5: Reports
What is a Project Baseline
A project baseline is the initial project plan which will be used as a reference in the future. It is used mostly to measure the real performance of the project against the initial schedule.
Creating a Project Baseline with ProjectLibre
When you have finished planning your project and before it begins it is a good time to save this ‘snapshot’ as a baseline.
Load up your project and click on File at the menu on the top and then on Save Baseline button
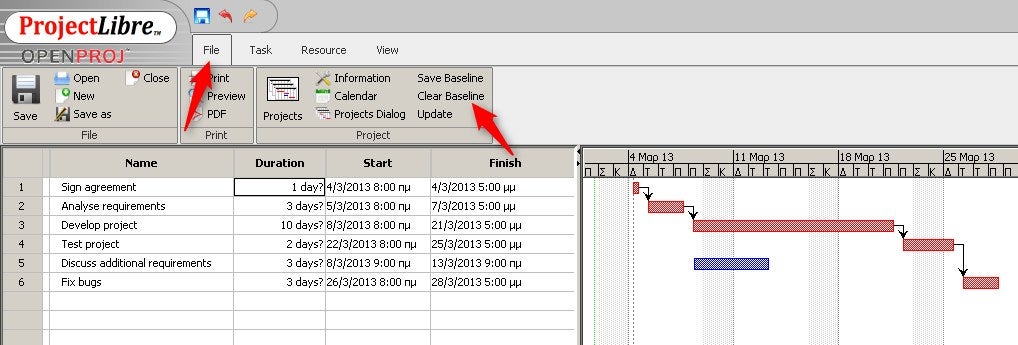
You will see a pop-up window with the following:
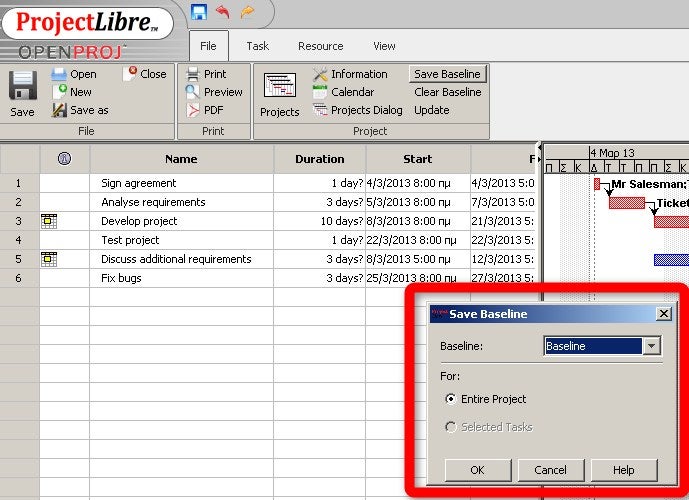
In a project you can have many baselines (up to 10). You can set the baselines at the most important project milestones or whenever there is a big change. Also, you can set the project baseline only for selected tasks of the project (you have to have some tasks selected for the option to be enabled). For the purposes of this tutorial you can go on and select ‘Baseline’.
If you are careful enough, you will notice something like a shadow below each project task at the Gantt diagram. The ‘shadow’ is your baseline.

Even if you change a task, the shadow remains the same until you ‘Save Baseline’ again. You can go on and change a task to see what happens.
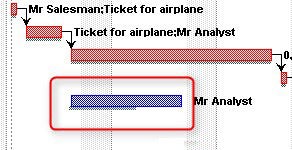
If you change a task after saving a baseline. You will notice that the ‘shadow’ remains intact.
ProjectLibre Calendar Options
With ProjectLibre you have many calendar options. You can define your own working and non days, and different calendars for different resources. Let’s start with the basics and edit your standard calendar.
Click on the ‘Calendar’ button on top. It should be available whether you are at the File, Task and Resource section of ProjectLibre. You will see that the available days have white background while the non-available days have gray background. At the standard calendar the non-available days are the weekends (Saturday and Sunday).

Select For “Night Shift ” on top left and see the changes. As you will notice, at Night Shift calendar the Saturdays are available for work.
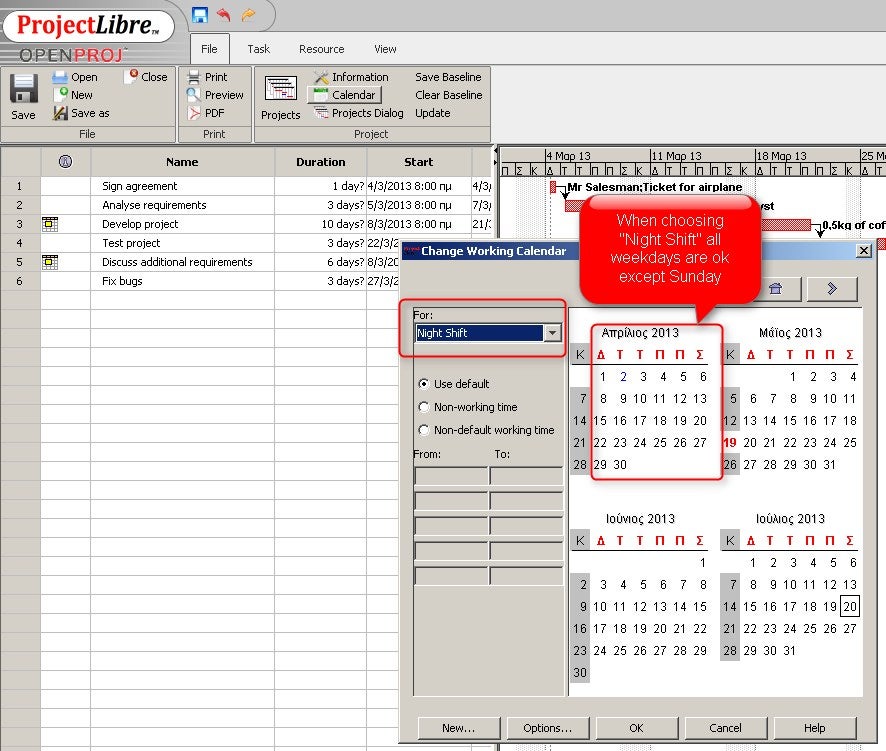
You can try selecting ’24 Hours’ too to see what happens. Now, select ‘Standard’ again and lets make some changes. You will notice that below Calendar choice are three options:
Use default: Use the calendar’s default option for this day
Non-working time: Ignore the calendar’s default option for this day and make this a non-working day
Non-default working time: Ignore the calendar’s default option for this day and make
Excluding days at calendar
One of the most common changes that people want to apply at the calendar is to exclude National Holidays from the calendar. Click on a day (eg 25th of March) and then select ‘Non-working time’

You will see that the day is now red with a gray background. The red color means that there is a special rule for this day and the gray background means that this day is not a working day.
You might see that the Gantt diagram does not look ok now where there is task dependancy. If such a problem occurs click on the connection arrow and ok in order to fix the connection.

Something else that you must pay attention to is that sometimes days might not be correctly recalculated. You should close the project and reopen it if something looks strange to you.
Including days at Calendar
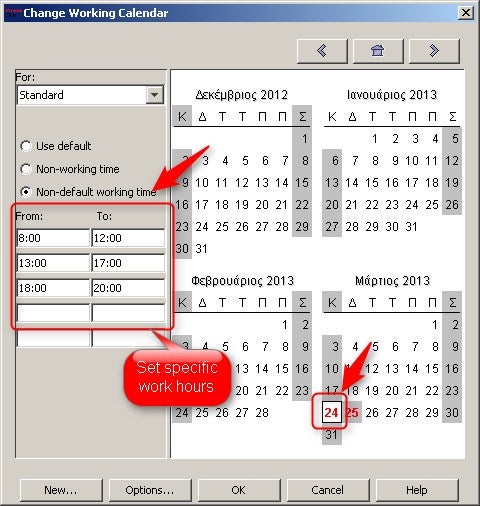
Similar to the previous instructions, by clicking on a weekend day (eg March 24th 2013) and selecting ‘Non-default working day’ you can set this day as a working day. Also, by selecting this option, you can set specific work hours for that day.
Defining your own Calendar
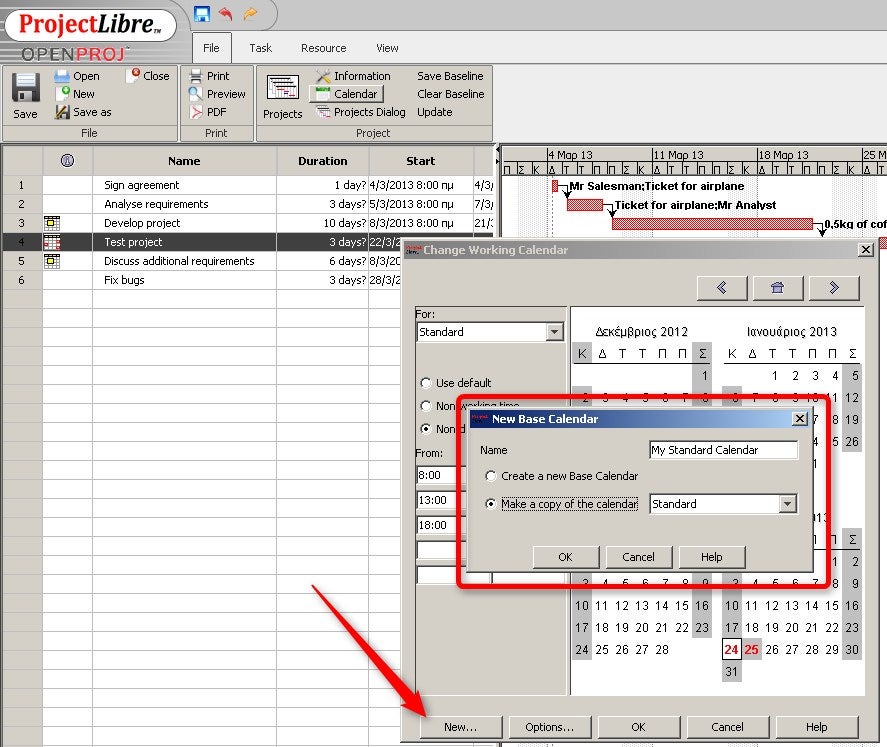
By clicking on ‘New’ at the bottom of the calendar window, you can create your own calendar that you can use. This might be useful if you have specific workhours for different teams, or resources. Your new calendar can be completely new or based on an existing calendar of yours.
Using the Calendar options
After defining your calendar options, you can set your new calendar or define the task’s calendar at the task’s details. Double-click on a task and then click ‘Advanced’. There is the option ‘Task Calendar’. You can choose the Calendar that this task will use there. Also, you can choose to ignore the Resource calendar or not (we will talk about this in a while)

Defining a calendar for each resource
Instead of defining a calendar for a task, you can define a calendar for a resource. Click on ‘Resources’ on the top menu and then on the ‘Resources’ button on the left to view your available resources. Double-click on a resource. At the ‘Resource Information’ dialogue you can see the ‘Base Calendar’ option. You can leave that option unchanged or change it to any other calendar (ProjectLibre’s or your own). After changing that option, if you click on the button on the right you can make further customizations.
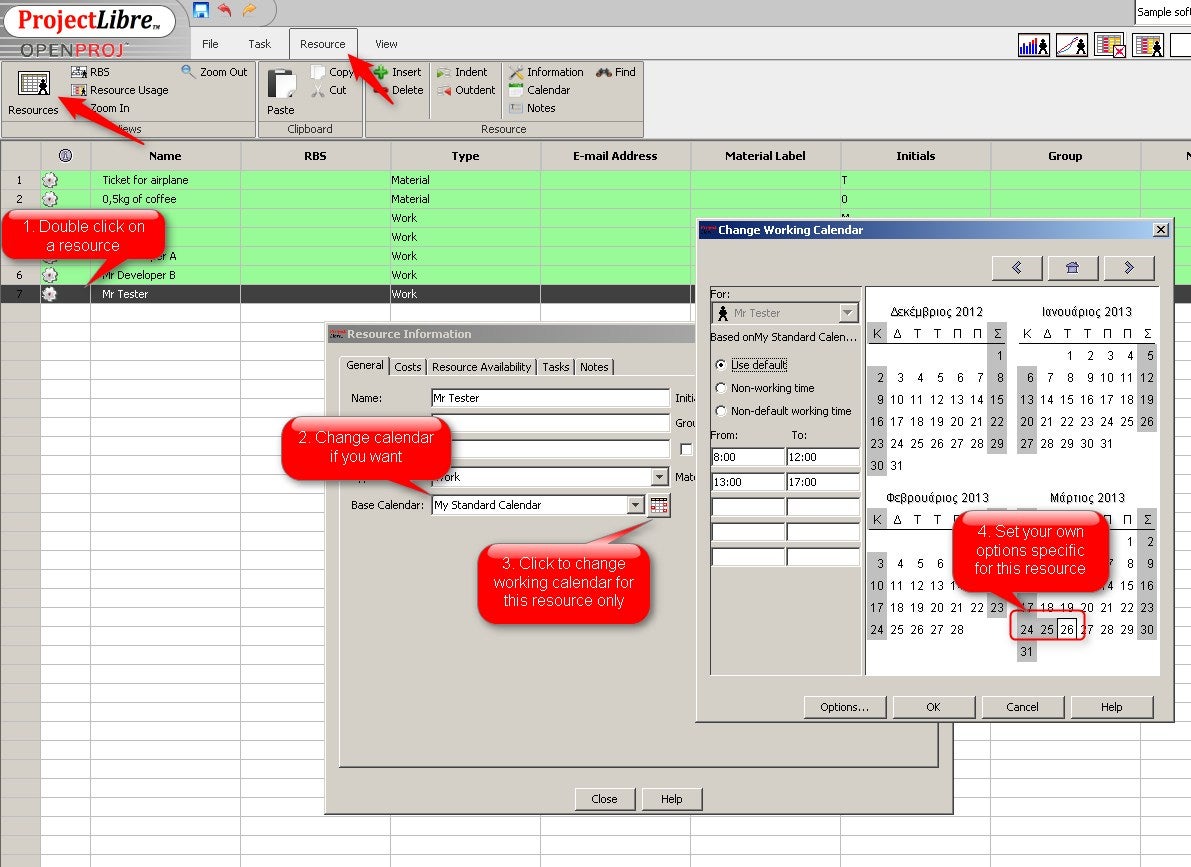
If you have defined the 25th of March as a national holiday, then you will see it as gray here. For the purposes of the tutorial, we will make this resource available. You can go on and click on a non-working day and select ‘Non-default working time’. Now, for only this specific resource, the calendar is changed

I hope that after this tutorial you had a great understanding of how Calendar works for ProjectLibre. At the next and final part of the tutorial, we are going to check ProjectLibre’s report features.
All tutorial parts:
- ProjectLibre tutorial Part 1: Creating your first project
- ProjectLibre tutorial Part 2: Task Breakdown, Resources
- ProjectLibre tutorial Part 3: Assigning resources, calculating costs
- ProjectLibre tutorial Part 4: Project Baseline, Calendar
- ProjectLibre tutorial Part 5: Reports