


At the first part of the tutorial we described how to create your first ProjectLibre project and add your first tasks. At this part of the tutorial, we are going to see how to add subtasks and how ProjectLibre handles resources.
All tutorial parts:
- ProjectLibre tutorial Part 1: Creating your first project
- ProjectLibre tutorial Part 2: Task Breakdown, Resources
- ProjectLibre tutorial Part 3: Assigning resources, calculating costs
- ProjectLibre tutorial Part 4: Project Baseline, Calendar
- ProjectLibre tutorial Part 5: Reports
Breaking down tasks
Let’s start by adding a master task. Add a task with a duration of 10 days as at the image below.

After adding the task lets breakdown this task to other tasks. Add another task called ‘Child task 1’ with a duration of 5 days and another task called ‘Child task 2’ with a duration of 7 days.

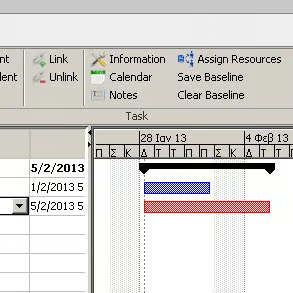
We now have three tasks independent from one another. As you have noticed, the first one is red. This is because it is the most critical one. Meaning that the project duration is dependent on that. Anyway, let’s connect ‘Child task 1’ and ‘Child task 2’ with ‘Master task’. If you right click on ‘Child task 1’ you will see some options. You can understand what New, Delete, Cut, Copy and Paste do. We are going to use the ‘Indent’ option for now. So, right click on ‘Child task 1’ and ‘Indent’. Do the same for ‘Child task 2’. You can see immediately the following:
- Both child tasks are ‘enclosed’ to Master task.
- Master task look has changed
- Master task duration has automatically changed.
Congratulations on making it possible to breakdown ‘Master task’!

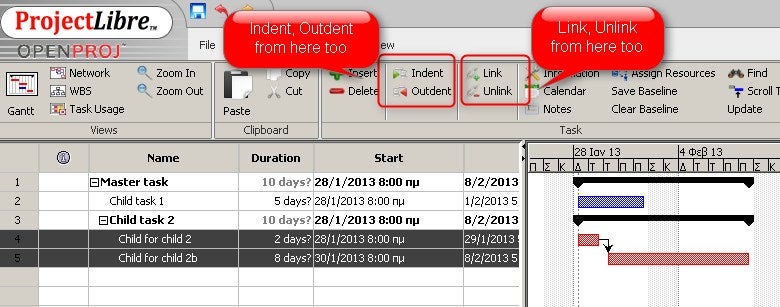
Let’s make things a little bit more complicated now. Below ‘Child task 2’ add ‘Child for child 2’ and ‘Child for child 2b’. Add a duration of 2 days for the first, and 8 days for the second. Also, link the two tasks as we have shown at the previous ProjectLibre tutorial part (making the ‘Child for child 2’ completion a prerequisite for ‘Child for child 2b’. Then select both tasks (hold Ctrl key pressed and click on number 4 and 5) and then click ‘Indent’. The result should look like the following picture:

Also, instead of using the mouse to Link and Unlink tasks and right click in order to indent you can use the following buttons located on the top toolbar.
Using resources for a project
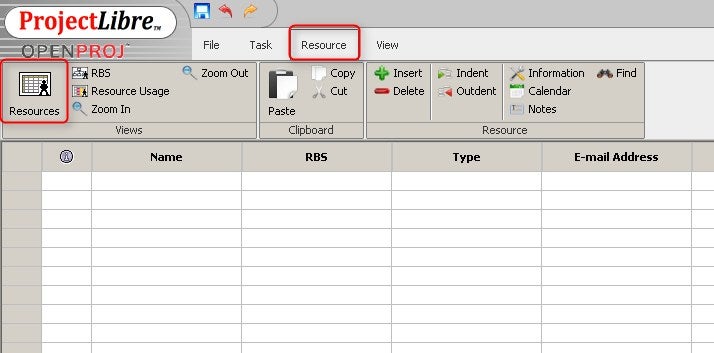
Since you got a pretty good idea about how you can handle tasks, break them down and connect them, we can now move on to the resources section of a project. Click on Resources at the top menu and you should see the following image:
Now go on and add the following resources as in the image, Mr Analyst (type=Work) and 1kg coffee (type=Material).

The important elements here are:
Type: It can be either material or work
Standard rate: Rate of use per hour
Overtime rate: If the resource is used at a time different than normal working hours (overtime). Then use this rate
Cost Per Use: This is for contract jobs or for materials. If you hire someone and you pay him a fixed amount to do the task, then you can use this item instead of standard rate. Also, if you consume some resources then you have to use this item too.
Accrue at: ‘Prorated’ means that costs are calculated when the task is planed, ‘Start’ means when the task starts and ‘End’ when the task ends.
Base calendar: We will get to this at a later part of the tutorial.
If you double-click on any resource row you can click on the ‘Costs’ tab and define different cost rules for different dates. If a resource charges a different amount for a specific job, you can take advantage of the ABCDE tabs, and define different rates. Also, at the ‘Resource Availability’ tab, you can define from when will this resource be available.

As in Task data entry, at resources, you can also have child resources. So, you can add a resource and ‘Indent’ it in order to show where it belongs. Notice however that the master’s rates are not auto calculated. You have to enter the rates yourself. It is up to you how you are going to handle resources break down.
That’s it for now. Save your project. At the next part of the tutorial we are going to describe how to assign resources to tasks and how project costs are calculated.
All tutorial parts:
- ProjectLibre tutorial Part 1: Creating your first project
- ProjectLibre tutorial Part 2: Task Breakdown, Resources
- ProjectLibre tutorial Part 3: Assigning resources, calculating costs
- ProjectLibre tutorial Part 4: Project Baseline, Calendar
- ProjectLibre tutorial Part 5: Reports