By integrating Jira with Wrike, organizations can achieve higher levels of productivity as they can effectively manage both their software development projects and other work tasks in one centralized platform. This integration allows for better coordination, improved communication, and streamlined workflows, ultimately resulting in increased efficiency and timely delivery of projects.
Check out our video overview below:
How To Integrate Jira Cloud Solution To Wrike
By integrating Jira with Wrike, organizations can achieve higher levels of productivity as they can effectively manage both their software development projects and other work tasks in one centralized platform. This integration allows for better coordination, improved communication, and streamlined workflows, ultimately resulting in increased efficiency and timely delivery of projects.
Wrike Sync is a highly effective tool that seamlessly integrates Wrike and other software through Unito.io to enhance your project management experience. With its powerful features, it allows you to establish two-way syncs between your Wrike account and 13 other integrated systems, including the widely used Jira platform.
This synchronization ensures that all your data and tasks are kept up to date across all platforms, eliminating any chances of miscommunication or duplication of work.
Let’s go over the steps on how you can integrate your Jira account to Wrike.
Step 1: Enable Wrike Sync On Your Wrike Account
The first step to integrating Jira with Wrike is to ensure that Wrike Sync is enabled in your account.
You can directly purchase the Wrike Sync add-on from Wrike. If you do, then it’s automatically enabled in your account. But if you don’t, you can follow the steps below, quoted from the Wrike Sync Help Center:
- 1. Click your profile image in the upper-right corner of the workspace.
- 2. Select Settings from the drop-down.
- 3. Click Subscription in the left panel.
- 4. Scroll through the page to find the Wrike Sync add-on.
- 5. Click the Add to Trial button.
- 6. A pop-up will appear at the top of the window to show that the Wrike Sync trial is activated.
- 8. Click Go to Settings on the pop-up. Alternatively, click your profile image again, select Apps & Integrations, and click the Project syncs tab on the left to open the settings.
- 9. (Optional) If there are multiple Wrike accounts associated with your email, select the relevant one.
- 10. Click the Authorize Wrike button to provide the sync tool access to your Wrike account.
- 11. And then click Accept.
Step 2: Connect Tools & Projects
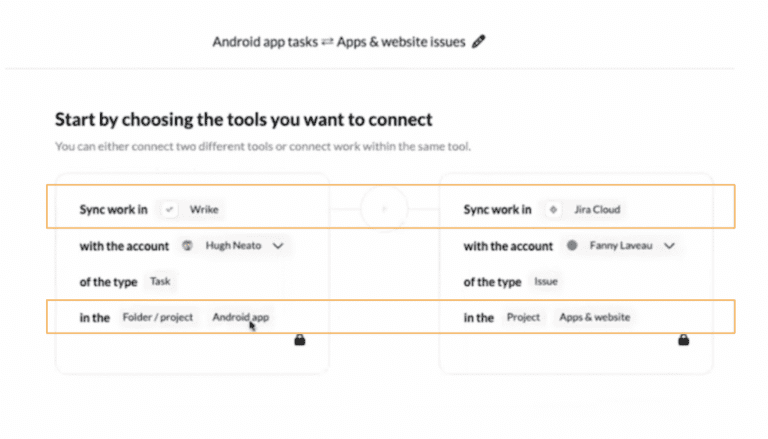
In the Project syncs window, click the Edit tools and choose the apps and lists/projects that you want to connect.
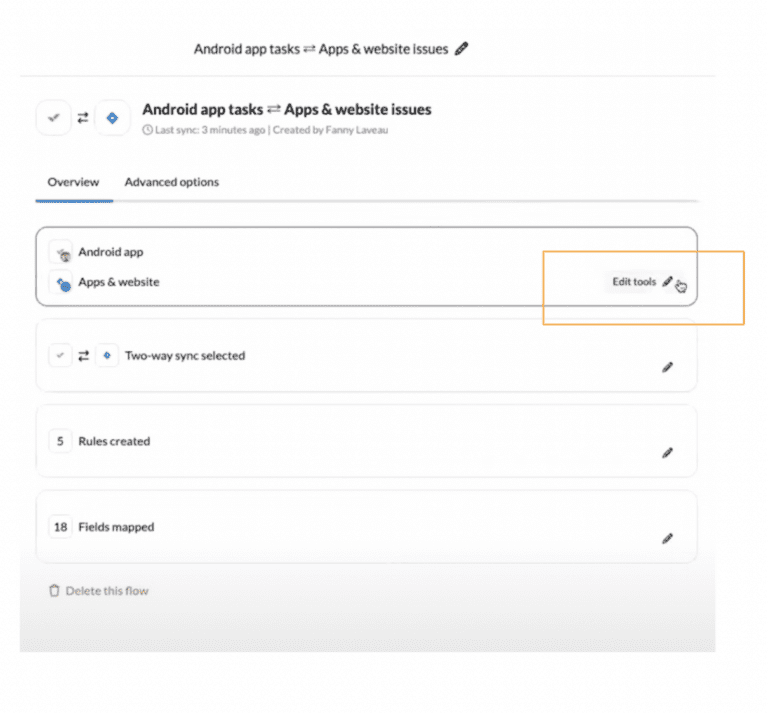
In the example below, Wrike and Jira are chosen, and the folders “Android app” in Wrike and “Apps & website” from Jira are to be synced.
Step 3: Identify Flow Direction
Your flow defines where tasks will be created and how each platform will communicate information.
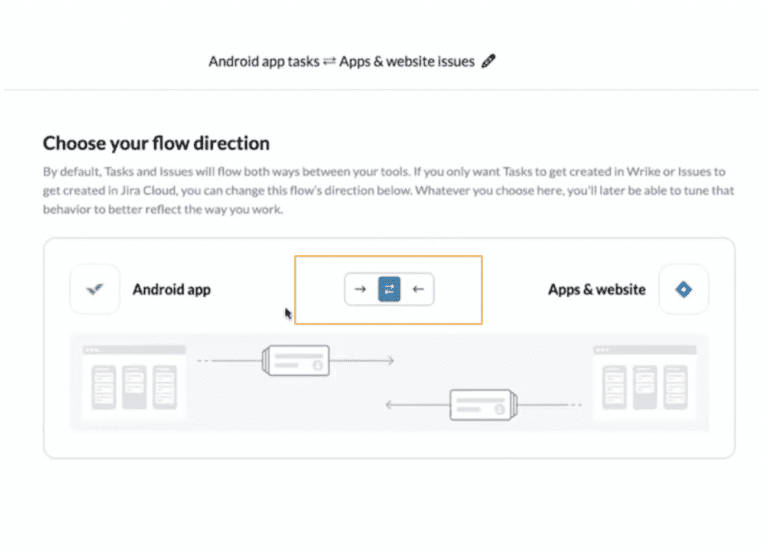
One-way sync, represented by a one-directional arrow icon, means that tasks can only be created in one platform, and it’s synced to the other. For example, if you establish a one-way sync from Wrike to Jira, it means that all tasks from Wrike will sync in Jira, but tasks created in Jira won’t sync in Wrike.
Two-way sync, represented by the two arrows pointing in opposite directions, means that information can be entered through both platforms.
Step 4: Create Rules
Sync rules define which tasks will be synced to the other program.
In the example below, you’ll see that Wrike tasks will only sync to the Jira project if the task is in the Android App folder if the status is open, and if the Collaboration setting is set to Devs. So if those criteria aren’t satisfied, the task created in Wrike will not reflect in Jira.
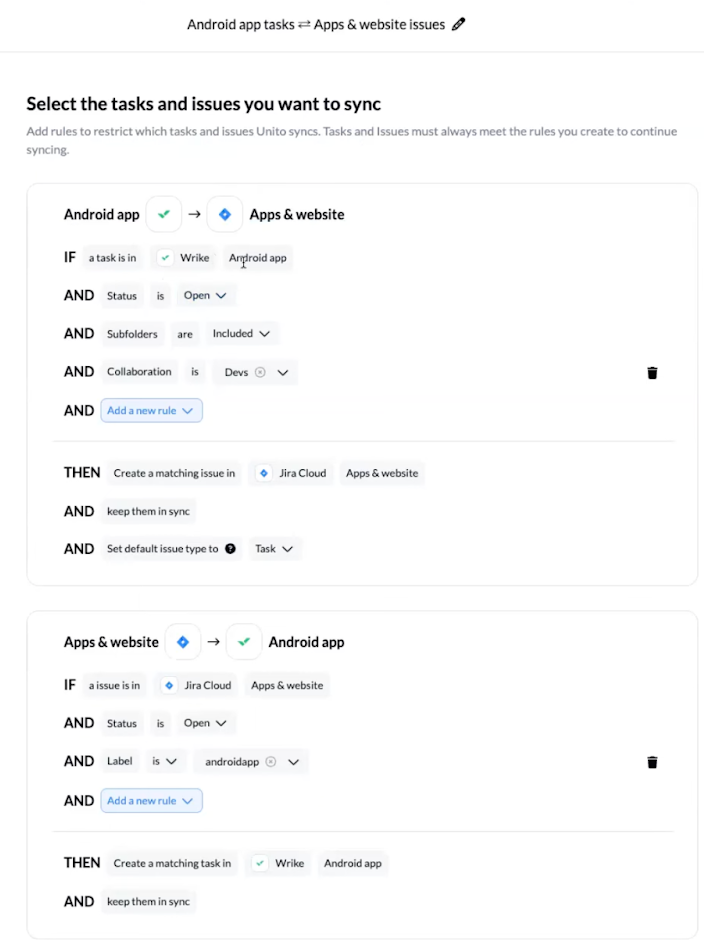
For tasks created in Jira, they will only reflect in Wrike if they belong to the Apps & Website folder, if the status is Open, and if the label is androidapp.
You can add as many rules as necessary. These filters help ensure that only relevant information is shared across lists and teams.
Step 5: Map Fields
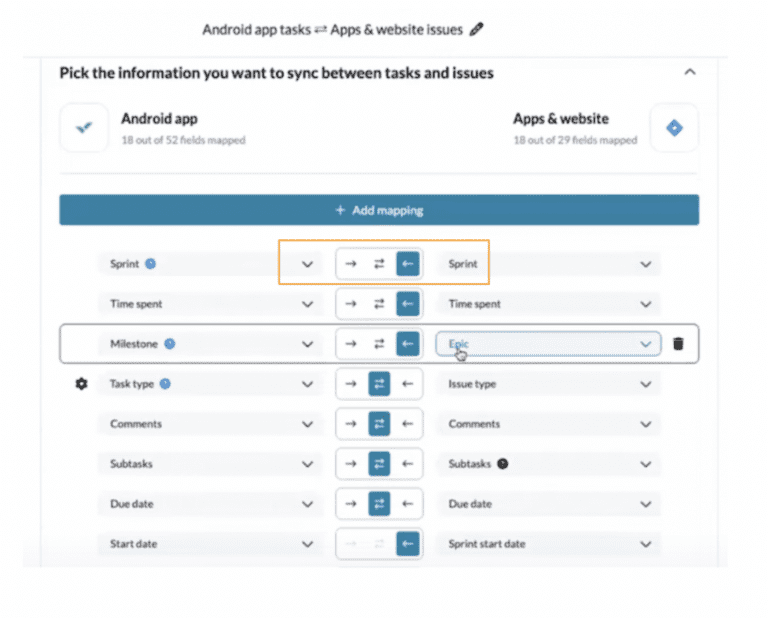
As a project management software meant for technical teams, Jira tends to use a different set of terms than Wrike. Mapping fields is aligning which task parameters in one platform correspond to the parameters of the other.
Some fields are the same on both platforms. For these cases, they are usually automatically mapped. (Eg. Sprint, Time Spent, Comments, Subtasks, Assignee, etc.) But for fields that aren’t similar, you’ll have to specify them manually. (Eg. Importance vs Priority, Milestone vs Epic, etc.) The sync type (one-way or two-way) for each field will also need to be selected.
In the example below, the Sprint field is on a one-way sync setting, while some others have two-way sync settings. This is because the project manager gives the autonomy to the dev team to organize their sprints.
You will also have to align the task statuses so both teams can seamlessly communicate their progress.
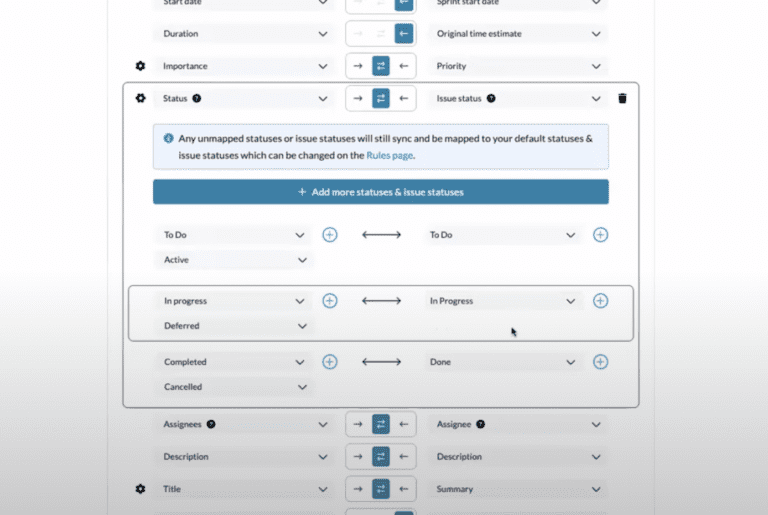
Finally, Wrike Sync allows for a setting to indicate Jira task numbers to Wrike for better alignment.
Once that’s in order, you should be all set in using Wrike and Jira together through Wrike Sync.
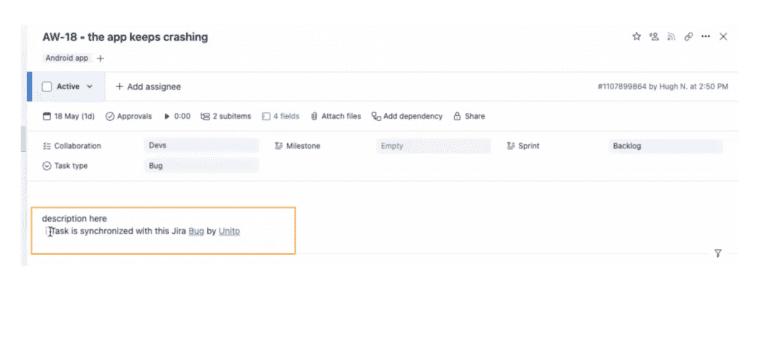
Whenever information is synced across platforms, a line appears on the task so you know that it’s already reflected in Jira.
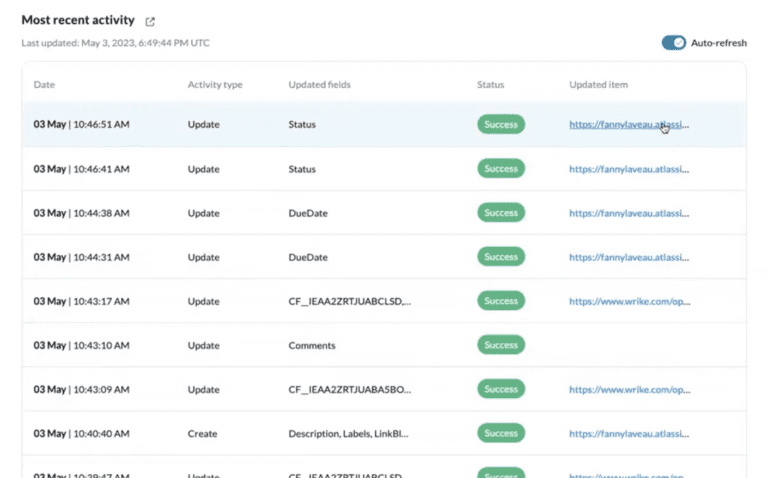
You can also view all sync activities in the Project Sync window and if they were successful. If they weren’t, it indicates the source of the task, and you can easily reach out to Unito support so they can assist you.
