monday.com’s highly visual work management platform that helps teams deliver projects successfully. Its ready-to-use tools and customizable boards enable teams to collaborate and perform more efficiently. Using monday.com’s powerful built-in automation features, you can streamline workflows and grow team efficiency. Here’s how to build automations in monday.com
Table of Contents
- Workflows and Automations
- Automation Recipes
- How to Create an Automation in monday.com
- Managing Board Automations
- What Can You Do With a monday.com Automation?
- Learn more about monday.com
- Alternative Project Management Software
Workflows and Automation
A workflow is a series of tasks a person completes to achieve a specific goal. In a workflow, team members need to perform every step of the work process in sequence to ensure quality and predictability. However, some steps are usually more routine and repetitive than others.
Monday.com automations handle the tedious work so you can keep your focus on tasks that require more personal attention and creativity. With monday.com workflow automation, tasks like status updates, email notifications, or due date alerts occur as needed and as expected without manual intervention.
Automation Recipes
monday.com includes automation features beginning with its Standard plan. You can run hundreds of code-free automations repeatedly to streamline your team workflow. But before creating monday automations, it is important to know its different parts.
Every automation has three parts or ingredients:
- Trigger – an event that qualifies the automation to run
- Condition – a requirement that the trigger must meet to prompt the automation to run
- Action – the event that happens or command executed when the trigger fully meets its accompanying condition
An automation recipe is a predefined combination of triggers, conditions, and actions. The following is an example of an automation recipe:
‘When Status changes’ to ‘No longer relevant’
Then ‘Archive item’
- Trigger – a change in the ‘Status’ column
- Condition – the presence of a ‘No longer relevant’ label
- Action – the command to ‘Archive item’
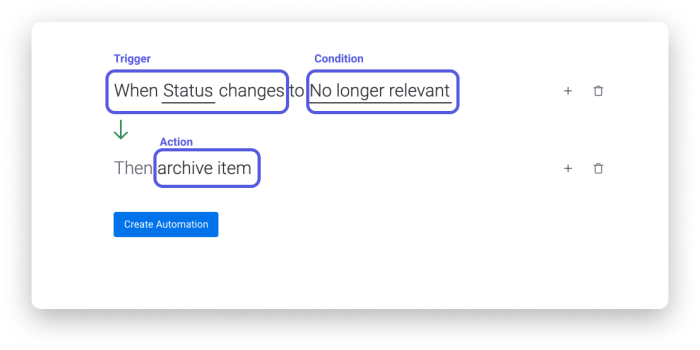
In this recipe, whenever the value or label in the Status column of an item changes to or becomes ‘No longer relevant’, that particular item will be automatically archived and will not appear on any board unless restored.
How to Create an Automation in monday.com
Build an Automation with monday.com’s Pro-Built Recipe Templates.
- Go to any monday board and click the Automate button on the upper right corner.
A new window with three tabs will pop up. Click the Automations Center tab.

- monday has numerous pre-configured Automation recipes that you can easily use.
On the left side of the window, you can choose from a list of recipes in different categories such as basic and commonly used automations, automations that notifies team members, or automations that involve dependency items.
Use the Search bar at the top to look for a particular automation like anything that involves a ‘status change’.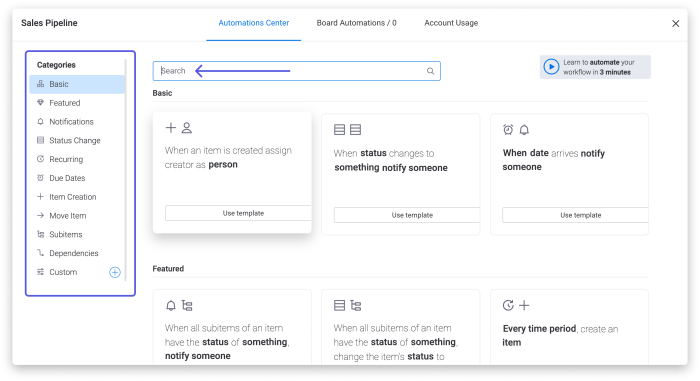
- Use the Search bar at the top to look for a particular automation. In this example, let’s create an Automation that involves a change in Status.
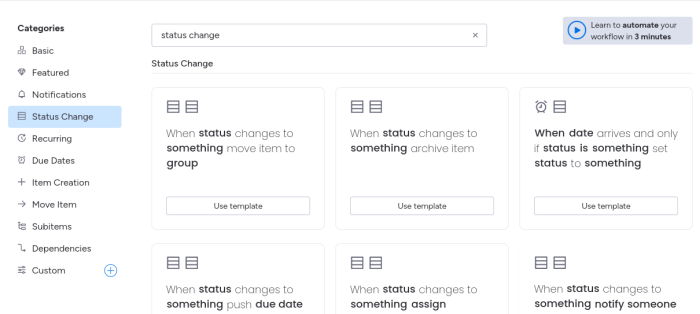
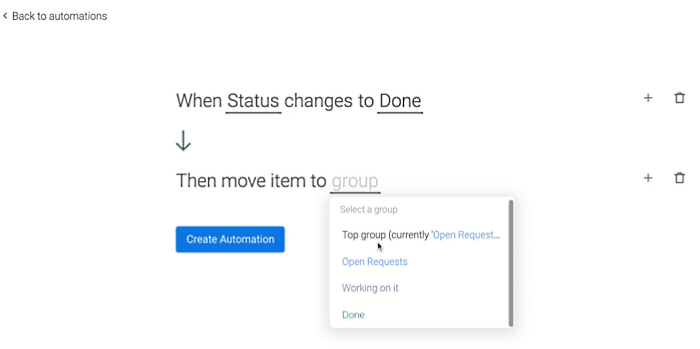
- Select a pre-configured recipe template under any category and fill out the underlined Fields.
When you click on the underlined item, a drop-down menu will appear that shows all available trigger, condition, and action options. Make your selections, then click Create Automations.
- Now, let’s build a Custom Automation.
If you cannot find the exact automation recipe to suit your requirement, you can always create your own. For example, you may want to create an automation that notifies a colleague whenever a task gets completed. To create this custom automation, from the Automations Center screen, click the Create Custom Automation button in the middle of the screen.
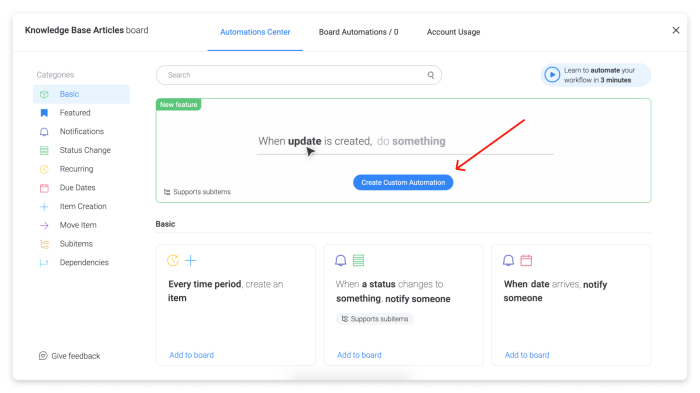
- A new screen will appear where you can build your automation from scratch.
The first step is to choose the building block of your custom recipe and the two options available are When and Every time period. In this example, select When as your building block.
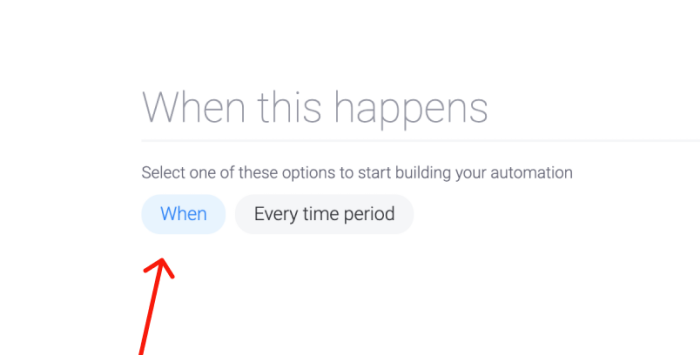
- The ‘When’ building block allows you to choose a trigger that involves a column from your board or an action that happens on your board.
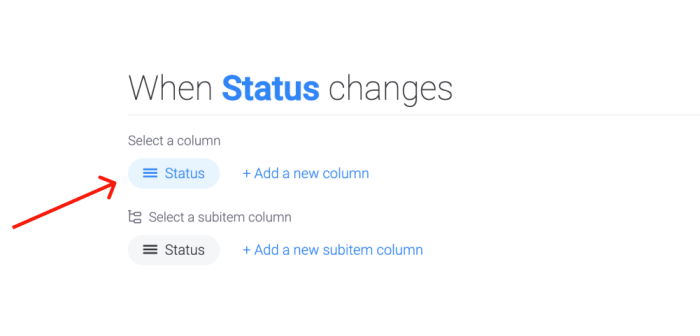
In this case, choose the Status changes block. The ‘status’ word is in blue to indicate you can replace it with an existing item in your board, such as the Status column. This sets the trigger of your recipe.
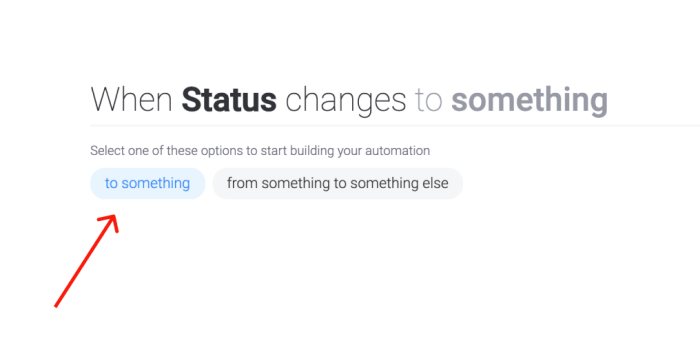
- Now, select your condition.
Your trigger looks for a change that occurs in the Status column. For this example, choose the condition ‘to something’, so that the trigger can look and test for a particular condition.
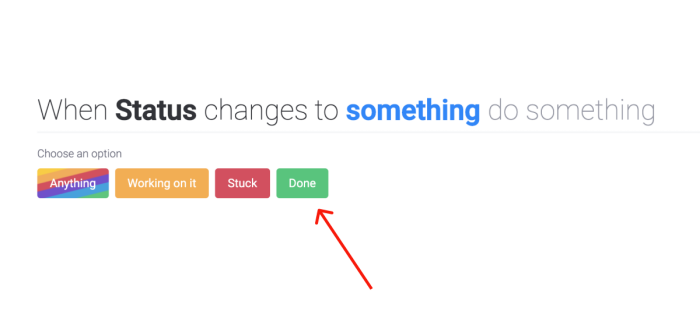
- The Something in your condition is a variable that can hold existing information such as a Label.
You can choose from the different labels that are valid labels of the Status column. For this example, choose Done. You have now set the condition for your trigger, which monitors any item whose label changes to Done.
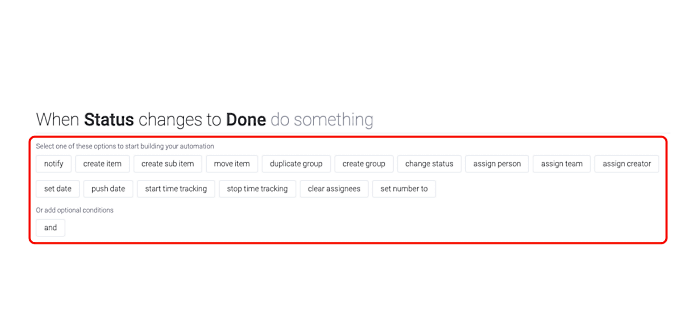
- Now set the Action for this automation.
For this recipe — “When Status changes to Done, do Something”, monday.com will display all the available options to complete your intended Action.
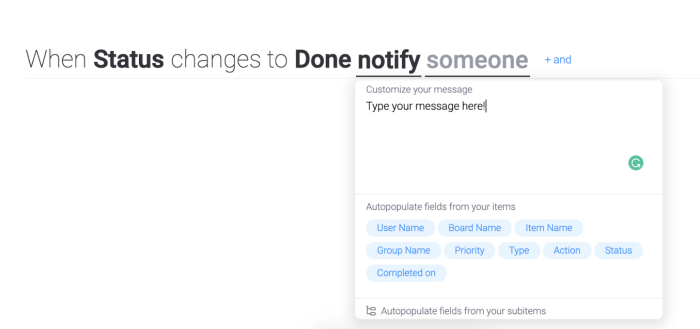
- Choose notify.
Click on the word notify and a small popup window will appear where you can customize your notification message. To save keystrokes, Monday will offer you a number of fields that will auto populate
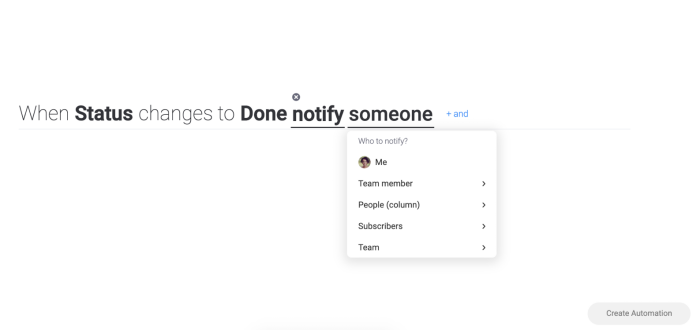
- Select the person to notify.
Click on the word someone and a dropdown menu will appear with the names and groups you can choose from. You can notify an individual, several people, or teams. You can also add up to six additional actions by clicking on the blue + and icon at the end of the recipe. You’re almost done.
- Create Automation’ button at the lower right corner of the screen.
You have now created your first monday.com custom automation!
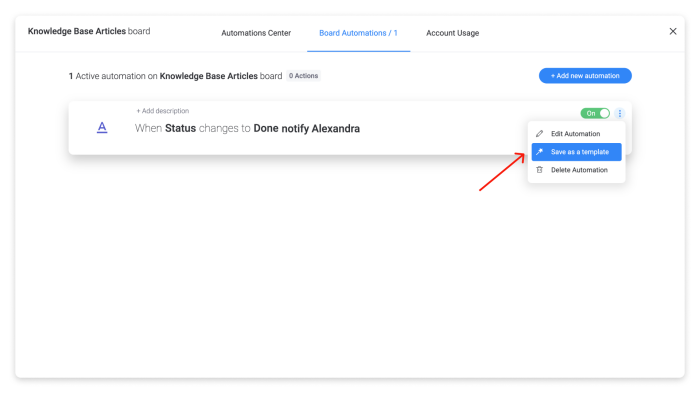
Managing Board Automations
You have three options for Managing your automations. From your monday.com board, click the Automate button in the upper right-hand corner. A new window appears and the default tab is on Board Automations. From this tab, you can:
- Turn your automation on and off by clicking on the toggle switch.
- Edit your automation recipe to change any part of your trigger, condition, and action.
- Save the automation as a template and make it available to the rest of your monday account users. You can also delete your automation from this tab.
How Many Automations Can I Use?
The Account Usage tab lets you track and control your actions. Take note that monday.com automations are dependent on the specific plan that you are using and every account has an action limit. For example, the Standard plan allows you to run 250 actions per month.
In the automation example, the action is to notify a certain person. So, every time that person is notified, your account uses one action.
What Can I Do With a monday.com Automation?
monday.com automations allow your team to work more efficiently. The software can monitor changes in your boards, perform set actions, and keep the team updated while you and your team spend more time on work you do best.
monday, as a flexible platform, can create advanced automations that include multiple recipes, work across boards, and connect with other apps through integration.
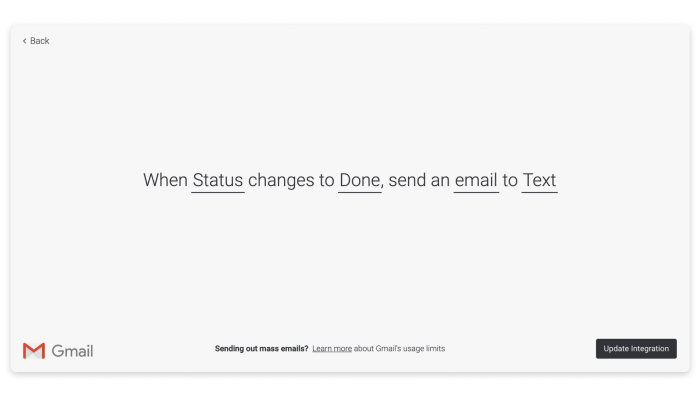
For instance, an automation that integrates with Gmail or Outlook can create monday.com automated emails. The recipe can be when status changes to something, send an email to someone, with the variables pointing to specific monday columns and data.
An example of a monday.com timeline automation recipe is When date arrives, move item to group and push due date by some days.
A more advanced recipe that creates monday.com automation between boards can look like this: When Status changes to something, create an item in another board and link them using a link to item column in this board.
Take a look at the video below to see how to build this automation.
Learn more about monday.com
Project-management.com’s editorial staff has researched and written extensive on monday.com. To learn more about this powerful work and project management system, check out these helpful stories.
How monday.com makes time keeping easier.
Go beyond the basics and get the most of monday.com with the 10 best monday.com tutorials.
Read our comprehensive, hands-on review of monday.com.
Read More: Top 10 Project Management Software
Alternative Project Management Software
monday.com‘s automations make it a powerful option for teams of just about any size to schedule, track, and complete work, and scale up quickly as needed. But if monday.com isn’t the right system for you, or you’re looking for a new project management tool, check out these other proven options.